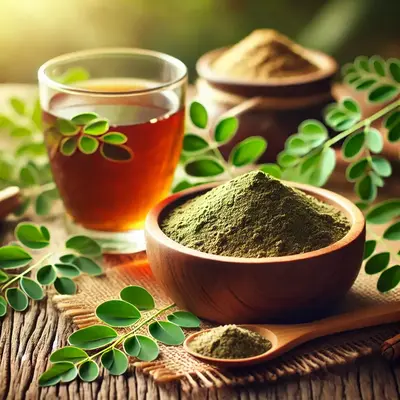
Why Make Your Own Moringa Powder? Freshness and Quality Control
Homemade moringa powder is free from additives, more affordable than store-bought versions, and gives you complete control over the quality. Plus, you'll reduce packaging waste! If you have access to fresh moringa leaves, this is the best way to enjoy their full benefits. Making it yourself also ensures the leaves are sustainably harvested and processed. You know exactly what goes into your moringa powder.
Health Benefits of Moringa Powder: A Nutritional Powerhouse
Moringa powder is a nutritional powerhouse, loaded with essential nutrients that can boost your well-being. Here are just a few of the benefits:
- Vitamins A, C, and E: These powerful antioxidants boost your immune system, protect your skin from damage, and support overall health. Learn more about moringa's health benefits.
- Calcium and Potassium: Essential for maintaining strong bones, healthy muscle function, and proper nerve transmission.
- Antioxidants: Moringa is rich in antioxidants, which help fight inflammation, reduce oxidative stress, and protect against chronic diseases.
- Iron: Supports healthy red blood cell production and energy levels, combating fatigue.
- Protein: Provides essential amino acids for building and repairing tissues.
Adding homemade moringa powder to your diet is a simple and cost-effective way to enhance your nutrient intake. Read about why Moringa is a great cheap superfood for families. Also, consider that Moringa can help with malnutrition and poverty because it's so easy to grow and so nutritious.
DIY Moringa Powder: Step-by-Step Guide to Making it at Home for Maximum Nutrient Retention
1. Harvesting Moringa Leaves for the Best Powder
Pick healthy, vibrant green moringa leaves early in the morning when they are most hydrated. Select young, tender leaves as they tend to have a milder flavor and higher nutrient content. Avoid leaves with any signs of damage, discoloration (yellowing), or insect infestation. Consider also that growing Moringa is easy.
2. Washing Moringa Leaves to Remove Impurities
Thoroughly rinse the harvested moringa leaves under cool, clean, running water. This removes any dirt, dust, or potential contaminants. Gently agitate the leaves in the water to dislodge any stubborn particles. After rinsing, gently shake off the excess water.
3. Drying Moringa Leaves: The Key to Quality Powder
This is the most critical step to prevent mold and preserve nutrients. Proper drying ensures a vibrant green powder with a long shelf life. Spread the washed moringa leaves in a single layer on a clean drying rack or screen in a well-ventilated, shaded area. Direct sunlight can degrade the nutrients. The ideal temperature is between 70-85°F (21-29°C) with low humidity. Air dry for 3-5 days, or until they are completely crisp and crumble easily.
Important Drying Tips:
- Humidity: High humidity is your enemy! If the air is humid, consider using a food dehydrator at a low setting (around 115°F or 46°C) for 8-12 hours. Check frequently.
- Testing for Dryness: The leaves should be brittle and easily crumble when touched. If they are still pliable, they need more drying time.
- Oven Drying (Use with Caution): You can use an oven on the lowest possible setting (ideally below 170°F or 77°C), but monitor closely to prevent burning. Spread the leaves on a baking sheet and leave the oven door slightly ajar to allow moisture to escape. Oven drying can reduce some nutrient content.
4. Grinding Dried Moringa Leaves into Fine Powder
Once the leaves are completely dry, it's time to grind them into powder. Use a high-speed blender (like a Vitamix), a food processor, or a spice grinder. Grind in small batches for the best results. If you don't have a blender, you can use a mortar and pestle, but it will require significantly more effort.
Tips for a Smooth Powder:
- Sifting: After grinding, sift the powder through a fine-mesh sieve to remove any larger particles and achieve a smoother texture.
- Re-grinding: If you find larger pieces, return them to the blender or grinder for a second round.
5. Storing Your Homemade Moringa Powder for Freshness
Transfer the finished moringa powder to an airtight glass jar or container immediately. Ensure the jar is completely dry to prevent clumping. Store the jar in a cool, dark, and dry place away from direct sunlight and heat. Properly stored moringa powder can maintain its freshness and potency for up to 6 months.
How to Use Moringa Powder: Creative Ideas and Recipes
Here are some delicious and easy ways to incorporate moringa powder into your daily routine. Start with ½ teaspoon per serving and adjust to taste. Remember that moringa powder has a slightly earthy taste that some people find a bit bitter, so start small! See our full list of moringa recipes for more ideas!
- Smoothies and Juices: Add a boost of nutrients to your favorite smoothies and juices. Try this: Combine 1/2 frozen banana, 1/2 cup berries, 1/2 tsp moringa powder, 1 cup almond milk, and blend! You can also make a Pure Moringa Juice.
- Soups and Stews: Stir in a spoonful of moringa powder for an added nutritional kick. Add it towards the end of cooking to preserve more nutrients. Try our Basic Moringa Soup Recipe.
- Oatmeal and Yogurt: Sprinkle it on your morning oatmeal or yogurt. A great way to start the day!
- Baked Goods: Add it to muffins, pancakes, or bread recipes (start with a small amount – about 1 teaspoon per cup of flour).
- Salads: Sprinkle a pinch on your salads for an earthy flavor and added nutrients.
- Dips: Mix it into your favorite dips, like hummus or guacamole. Start with 1/4 tsp and taste.
- Pesto: Add a unique twist to your pesto recipe. Replace some of the basil with moringa powder for a nutrient boost.
If you want to enjoy Moringa in a simple warm drink, check out our How to Make Moringa Tea at Home guide.
Frequently Asked Questions About Making Moringa Powder
How long does homemade moringa powder last?
Properly stored homemade moringa powder maintains peak freshness for 6 months in an airtight container. Store in a cool, dark place away from moisture and heat.
Can I use a regular blender to make moringa powder?
Yes! While high-speed blenders like Vitamix work best, any blender can work. You may need to blend in smaller batches and sift the powder to achieve a fine consistency.
Why does my moringa powder taste bitter?
Moringa naturally has an earthy, slightly bitter taste. Using younger leaves, proper drying, and starting with small amounts (1/4 teaspoon) can help. The bitterness often becomes less noticeable when mixed into smoothies or recipes.
Is homemade moringa powder as nutritious as store-bought?
Often more nutritious! Homemade powder is fresher, contains no additives, and you control the drying process to preserve maximum nutrients. Commercial powders may lose potency during processing and storage.
Watch: How to Make Moringa Powder at Home
Why This Method Works: Based on Traditional Practices
This drying and grinding method is based on traditional techniques used in moringa-growing regions like India and the Philippines, where families have been making their own moringa powder for generations. The low-temperature drying process we recommend is scientifically proven to preserve more nutrients than high-heat commercial processing.
Potential Side Effects and Precautions
While moringa powder is generally considered safe, it's important to be aware of potential side effects and precautions:
- Digestive Upset: Some people may experience mild digestive upset, such as gas or bloating, especially when consuming large amounts of moringa powder. Start with a small dose and gradually increase it as tolerated.
- Medication Interactions: Moringa may interact with certain medications, such as those for blood pressure, blood sugar, and thyroid conditions. Consult with your doctor or pharmacist before adding moringa powder to your diet if you are taking any medications.
- Pregnancy and Breastfeeding: There is limited research on the safety of moringa powder during pregnancy and breastfeeding. It's best to consult with your healthcare provider before using moringa powder if you are pregnant or breastfeeding.
This guide is for informational purposes only. Consult a healthcare professional before adding moringa powder to your diet, especially if you are pregnant, breastfeeding, or taking any medications. For more information, see our full disclaimer.